Install and permissions
Pick the download for your Mac's chip, install Curtains on macOS 13 or later, allow Screen Recording, and when Curtains asks for Accessibility.
On this page
Curtains installs like any Mac app and needs one permission, Screen Recording, to see the windows you pick.
What you need
- A Mac running macOS 13 or later, with Apple silicon or an Intel processor. There’s a download for each. See Apple silicon or Intel.
- No account. Every new install starts with a 14-day trial of Pro, then keeps working on Free, which shares up to two windows at a time. See Plans.
- Windows is coming. This page is about the Mac app.
Apple silicon or Intel
Curtains comes in two versions, one for Macs with Apple silicon and one for Macs with an Intel processor. The download page puts the one for your Mac first when your browser can tell. To check:
- Choose Apple menu › About This Mac.
- If you see Chip, followed by a name like Apple M1, your Mac has Apple silicon. Download for Apple silicon.
- If you see Processor, followed by a name with Intel in it, your Mac has an Intel processor. Download for Intel.
Got the other one by mistake? On an Intel Mac, the Apple silicon version doesn’t open, and macOS says it isn’t supported on this type of Mac. On Apple silicon, the Intel version asks you to install Rosetta and runs slower. Either way, download the right one and replace the copy in your Applications folder. Updates keep the version you have.
Install Curtains
- Download Curtains for your Mac. You get a disk image, a file ending in
.dmg. - Open the disk image and drag Curtains into your Applications folder.
- Open Curtains from Applications. It’s signed and notarized by Apple, but macOS may still ask you to confirm that you want to open an app downloaded from the internet. Click Open.
Curtains checks for updates when it opens and once a day. To turn that off, switch off Check for updates in Settings › Privacy & updates. To check right now, click the plan item at the bottom of Studio’s rail and click Check now under Updates.
The first run
Curtains opens on a welcome screen that explains the idea in one picture: the windows you pick combine into Curtains Presenter, and you share that one window in your meeting. Click Get started.
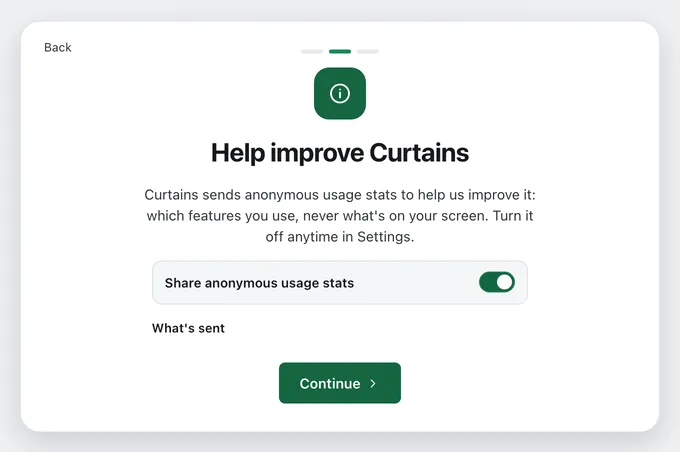
Next comes a notice about anonymous usage stats, which tell the makers of Curtains which features get used, never what’s on your screen. Outside the EU, the UK and Switzerland the Share anonymous usage stats switch starts on. Inside them it starts off and nothing is sent unless you turn it on. Open What’s sent to see exactly what’s included, then click Continue. You can change your answer later in Settings › Privacy & updates. See Usage stats and privacy.
Allow Screen Recording
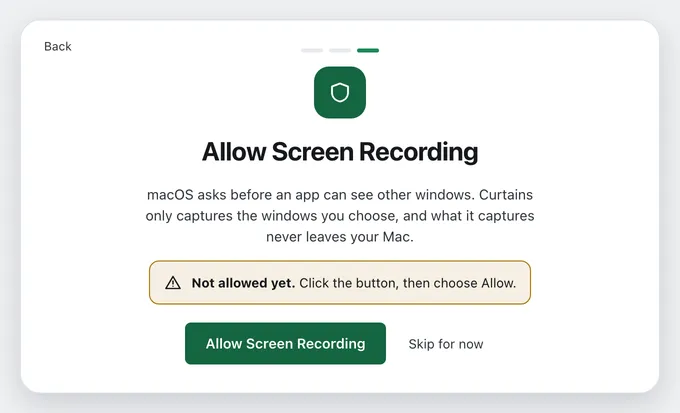
macOS asks before any app can see other windows. Curtains captures only the windows you choose, and what it captures never leaves your Mac. Frames stay in memory and are never saved to disk.
- On the Allow Screen Recording screen, click Allow Screen Recording. macOS shows its own prompt.
- Follow the prompt to System Settings, and switch Curtains on in Privacy & Security › Screen Recording. On macOS 15 and later the list is called Screen & System Audio Recording.
- Back in Curtains, the screen says Screen Recording is on. Click Choose windows to share.
macOS may then say Curtains needs to quit and reopen. That’s expected. The screen says Almost there and offers Restart Curtains; click it and the permission takes effect.
macOS shows its prompt only once. If you dismissed it, the screen offers Open System Settings and Restart Curtains instead. Switch Curtains on in System Settings, then restart.
If you skipped the permission
Click Skip for now and you can still open Studio, but Curtains can’t see your windows. A banner at the top of Sources says Screen Recording permission needed, and only Curtains’ own test patterns are listed.
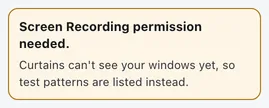
Use the banner’s buttons the same way as on the first run: Allow access, then Open System Settings and Restart Curtains. When macOS needs the restart, the banner says Restart Curtains to finish enabling Screen Recording and offers Restart now.
Newer versions of macOS also ask you from time to time to confirm that an app may keep recording the screen. If Curtains stops seeing your windows afterward, the same banner comes back. Follow the same steps.
Accessibility, only when you resize windows
Accessibility is a second macOS permission, and Curtains asks for it only when you use something that needs it:
- Fit all windows and the per-window size actions, which move and resize other apps’ windows. See Fit and resize windows.
- Bring to front, to raise the exact window rather than only its app. Without Accessibility, Curtains switches to the app, and the app decides which of its windows comes forward. See Bring to front.
Curtains never asks at launch. The first time you use one of these actions, macOS shows its prompt. After that, Studio shows a note in the Layout panel instead.
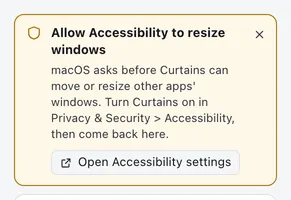
- Click Open Accessibility settings.
- Switch Curtains on in Privacy & Security › Accessibility.
- Come back to Curtains. It checks again as soon as Studio is in front.
You can also find the setting under Settings › Windows › Accessibility permission. Everything else in Curtains works without it.
Keep it running in the menu bar
Curtains adds an icon to the menu bar and keeps running when you close Studio, so it can notice when you join a call. Click Curtains in the Dock, or the menu bar icon, to bring Studio back. To really quit, choose Quit Curtains from the menu bar icon. See Floating remote and menu bar.
Two switches in Settings › General control this: Keep running in the menu bar when Studio is closed, on by default, and Launch at login, off by default.
Next steps
- Your first share: one meeting from start to finish.
- Studio tour: every part of Studio, and where to find it.
- Troubleshooting: when Curtains can’t see a window.